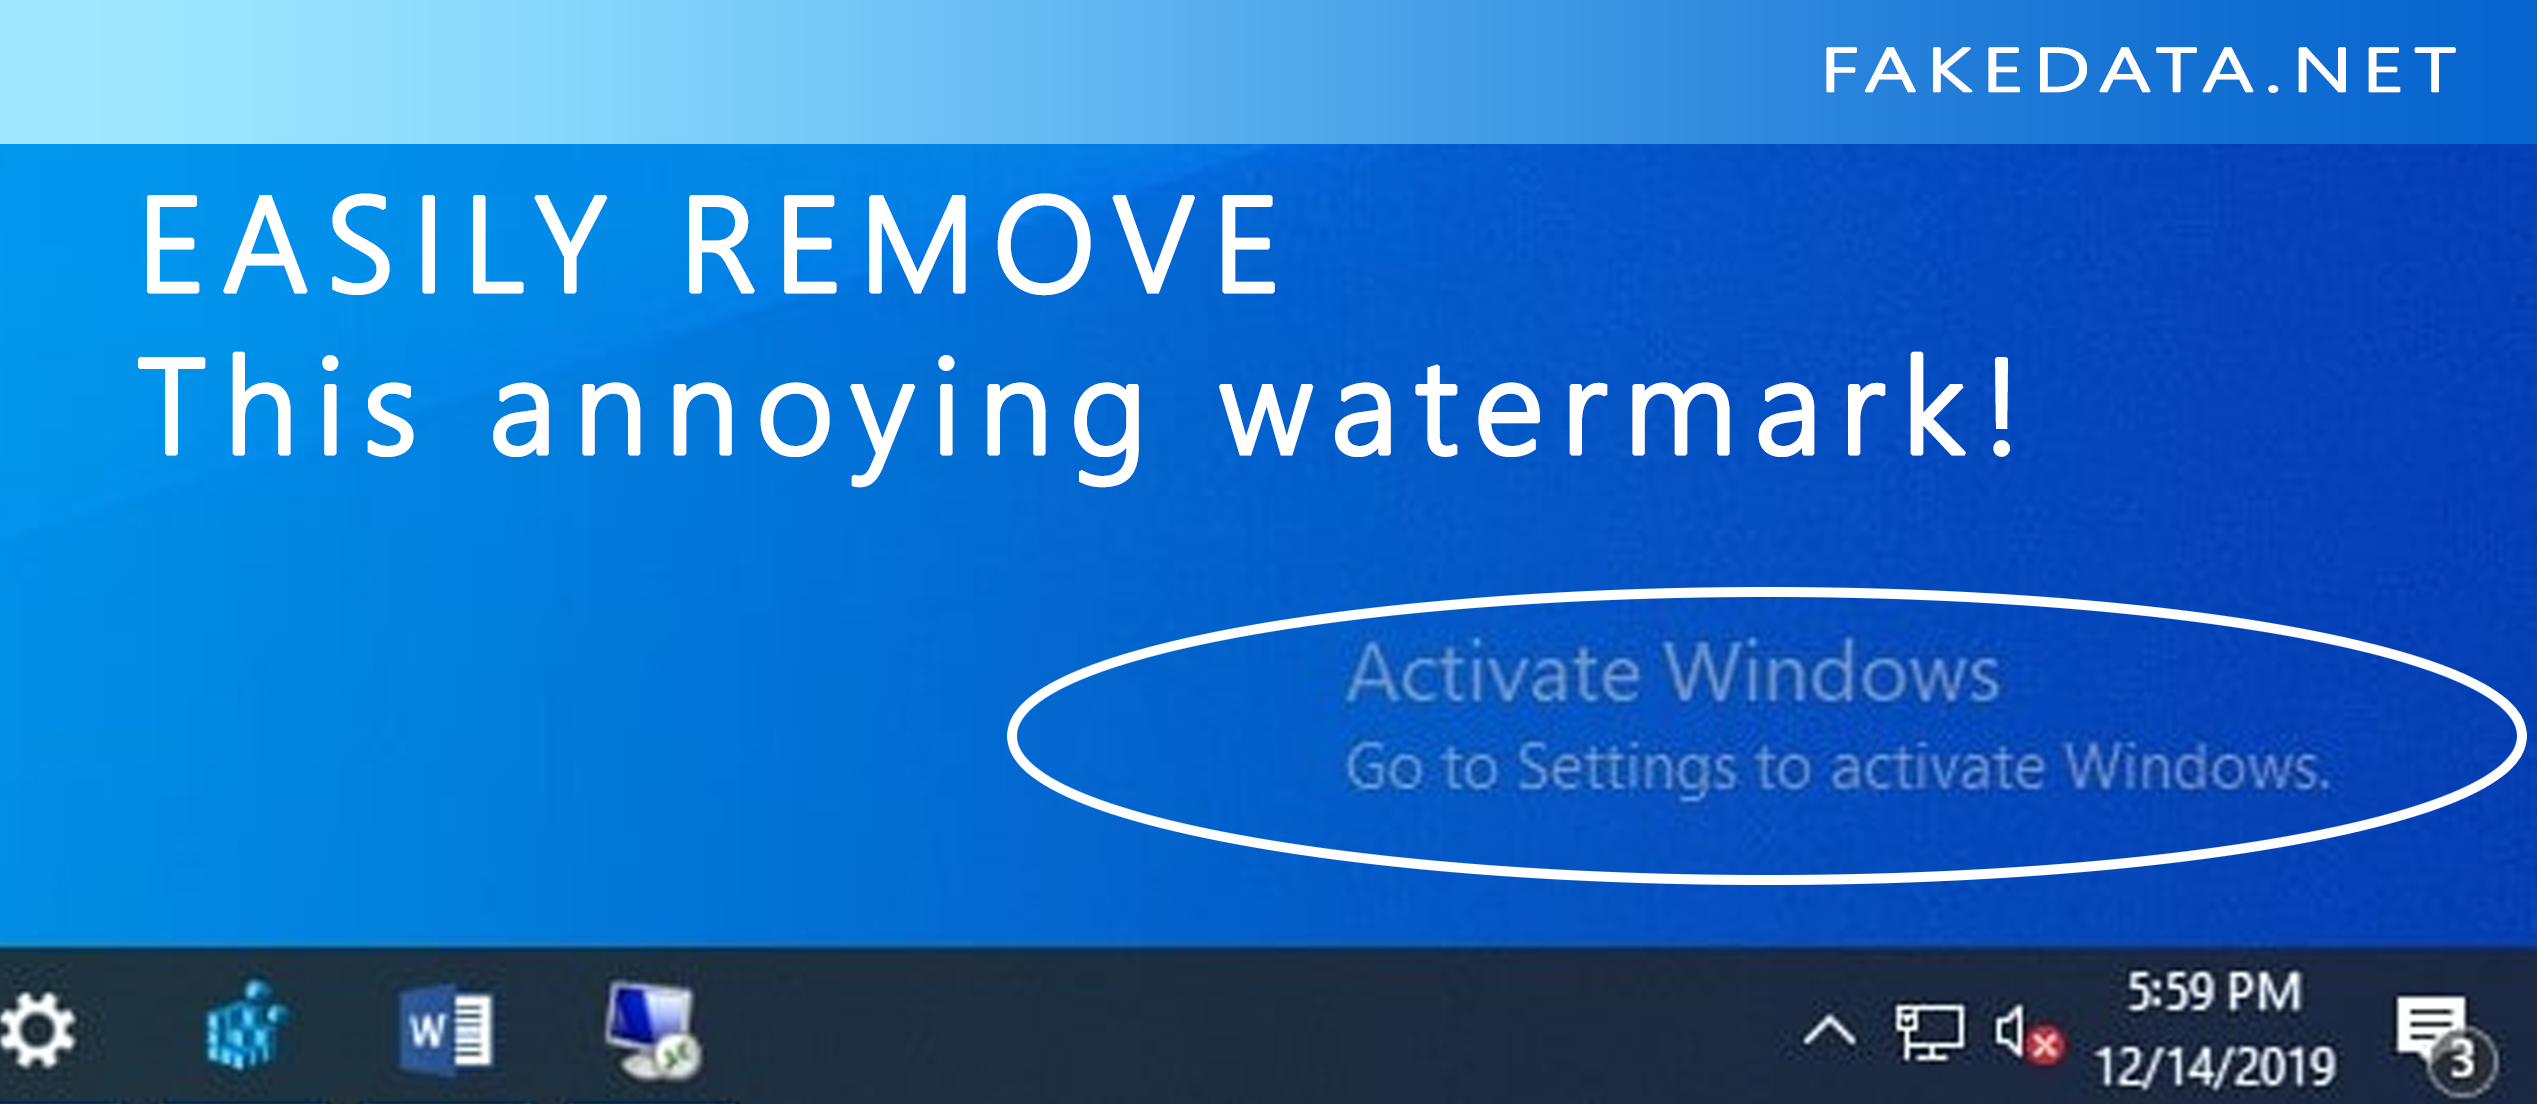
Are you currently seeing this annoying watermark on your Windows PC or Laptop? Of course you do! Otherwise, you won’t be here. LOL. Anyway as the title stated on this tutorial I am going to show to you how exactly you can remove the “Activate Windows” watermark permanently and be annoy-free!
This method works with Windows 8, 8.1, and Windows 10. If you have a different version of windows such as windows 7 then you might just try it though I am not sure if its going to work since I only tried it with the 3 versions of Windows.
So why are you seeing this watermark of all the sudden? It’s simply because Windows found out that your version of the OS is not activated. They are simply reminding you you activate your Windows copy to enjoy more features. What are these features?
First off, Why You Need To Activate Your Windows OS?
To enjoy more features on an activated version of Windows. These features are as follows:
- Activate Windows Defender – This feature is really important since its your first line of defense against malware and viruses.
- Install Microsoft Office – did you know that you can’t install any microsoft office product unless you activate your OS? Now you know then activate it already.
- Install security updates – this is really an important feature. Get your PC updated with the latest security updates.
- Change your desktop wallpaper – probably the most important feature of all! Change your desktop wallpaper is the most crucial feature. If you can’t change your wallpaper then you are using a DEAD PC. It feels like the PC don’t belong to you! No customization sucks! You should thank me for saving your arse with this method.
How to Permanently Remove “Activate Windows” Watermark
Ok, the moment of truth. The method that you came here for. Its not that hard and involved various methods. Let’s start with the easiest and most effective method.
Method 1:
Using the Universal Watermark Disabler Tool
- Download the Universal Watermark Disabler tool from here don’t worry its FREE!
- Of course unzip all the files to use it.
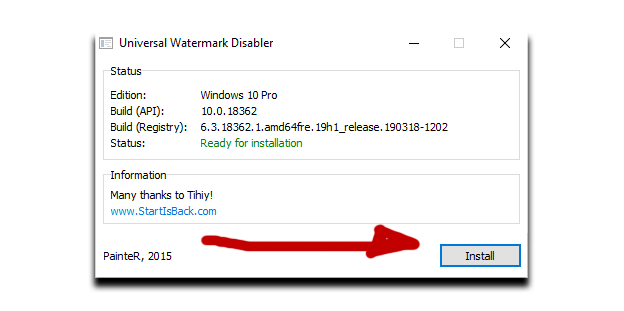
- Run and install the uwd.exe file
- After the successful install you will immediately notice the watermark is gone! Feels like magic!
- Of course this process is not actually activating your Windows OS. You are simply removing the watermark. The above features will still not available.
Method 2:
Using only CMD or Command Prompt
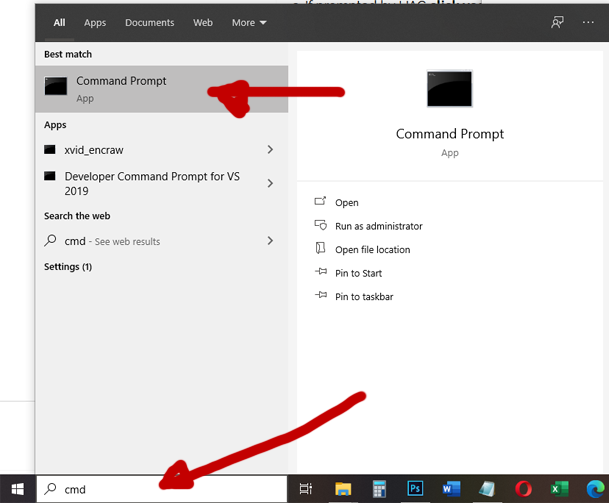
The CMD method or Disable the Watermark using just a Command Prompt. You don’t know what command prompt? Google it! freaking Lazy….
- Anyway to run CMD of command prompt simply go to your search bar and type “CMD” without quotes.
- When you are now in the CMD type in bcdedit -set TESTSIGNING OFF then hit enter
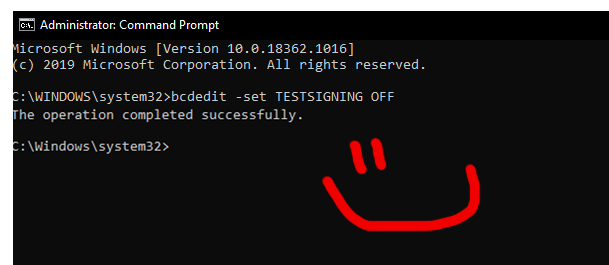
- If successfull you will see a message “The operation completed successfully” if not then you will see “TESTSIGNING OFF FAILED” If this process failed then move on with the next method!
Method 3:
By Editing Registry Keys
Remove Activate Windows Watermark by editing the Registry keys!
- Type in your search bar “REGEDIT” without quotes and hit enter if the Register Editor App appears.
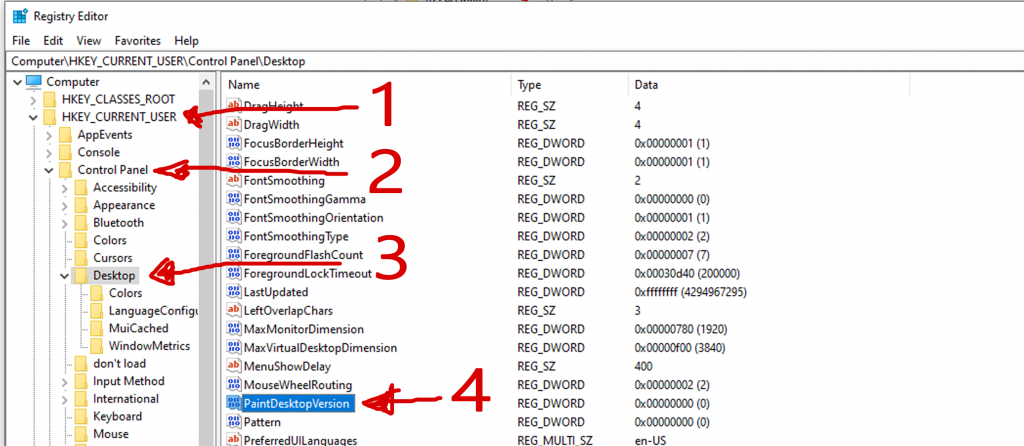
- Now go to HKEY_CURRENT_USER / Control Panel / Desktop. See image.
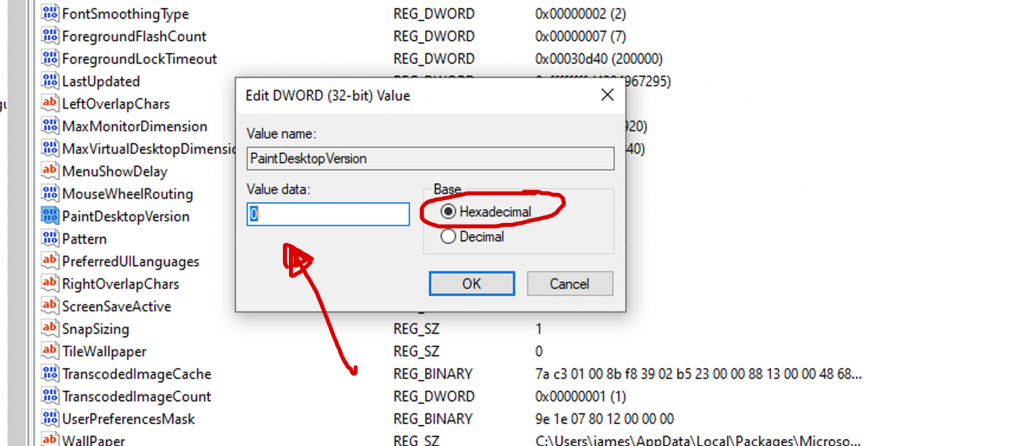
- Double click the PaintDesktopVersion and edit its value from 1 to 0 (zero) and click on okay. See image.
- Now when you notice the watermark is still there. Don’t worry. It will be gone after you restart your PC.
Method 4:
Using a Special Batch Script
- Remove “Activate Windows” Watermark using this special script.
- Go to this pastebin URL.
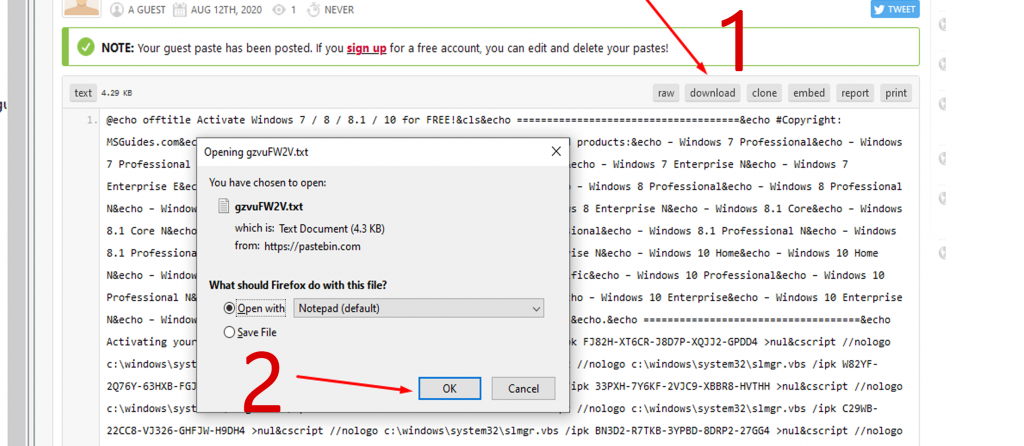
- Copy the whole content or better yet download it as .txt file.
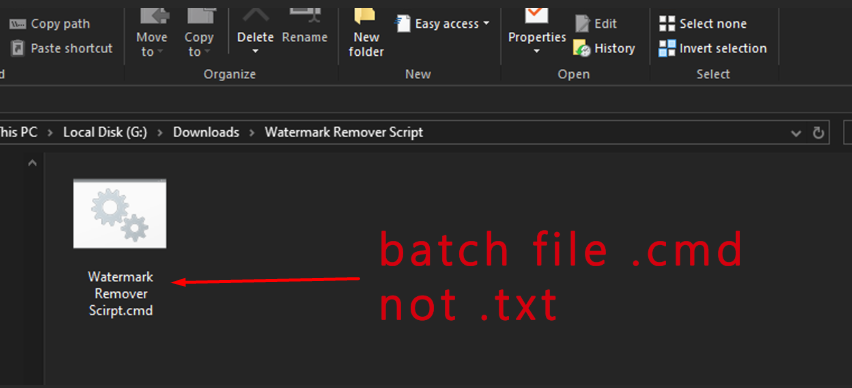
- Now to the folder where you have downloaded the text file and rename it. Rename it with any name and change the filetype to .cmd and not .txt make sure you do this otherwise this wont work!
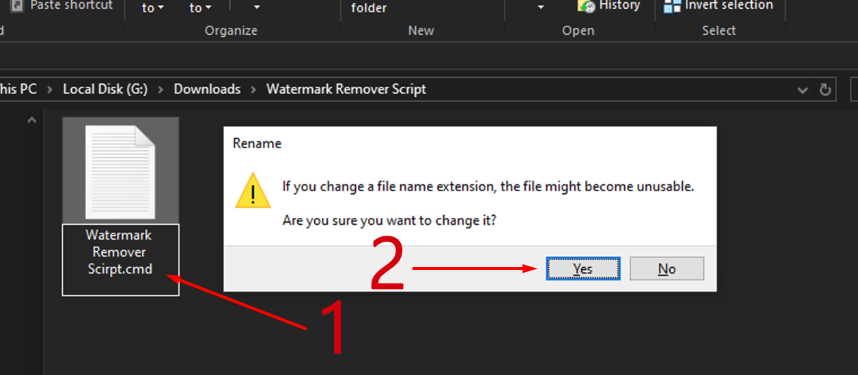
- Now the file has been changed to a batch file.
- Now right click on the file and click on the “RUN AS ADMINISTRATOR” you will see the process is running. I can’t show you screenshot as my copy of windows is already activated and no need to run this on my machine.
- If everything went well it should remove the watermark after a RESTART.
- Otherwise you will see an error message “Sorry! Your version is not supported”
EASIEST THE MOST EFFECTIVE METHOD:
Buy a legit Windows Serial Keys
- This is probably the most easy method on how to remove the activate windows watermark forever! Plus you got to enjoy those special features I mentioned above.
And that my friend are the best and easiest methods on how you can remove the “Activate Windows” watermark your Windows desktop or laptop. I made it as easy as possible so users can follow without a fuss! Got questions? Comment below!